Installation Guide
This guide provides detailed instructions for installing InSARLite and its dependencies.
Important
Supported Platform: InSARLite has been developed and tested exclusively on Ubuntu Linux (20.04 and 22.04).
Other operating systems have NOT been tested and are not officially supported. While InSARLite may work on other Debian-based distributions, we cannot guarantee compatibility or provide support for installation issues on untested platforms.
For the most reliable experience, we strongly recommend using Ubuntu 20.04 LTS or Ubuntu 22.04 LTS.
Platform Compatibility
✅ Tested and Supported
Ubuntu 20.04 LTS (Primary testing platform)
Ubuntu 22.04 LTS (Primary testing platform)
⚠️ Not Tested (Use at Your Own Risk)
Other Debian-based Linux distributions
RHEL/CentOS/Fedora
macOS
Windows Subsystem for Linux (WSL2)
❌ Not Supported
Native Windows (GMTSAR cannot be compiled on Windows)
System Requirements
Minimum Requirements
Operating System: Ubuntu 20.04 LTS or Ubuntu 22.04 LTS
Python: 3.8 or higher
Memory: 8 GB RAM
Storage: 50 GB free space for SAR data processing
Display: GUI support (X11 for remote systems)
NASA Earthdata Account: Required for Sentinel-1 data downloads (Register here)
Recommended Requirements
Operating System: Ubuntu 22.04 LTS
Python: 3.9 or 3.10
Memory: 16 GB RAM or more
Storage: 100 GB+ SSD for optimal performance
Network: Stable internet connection for data downloads
Processor: Multi-core CPU (4+ cores recommended for parallel processing)
Dependencies
InSARLite has two types of dependencies: Python packages (installed automatically) and system dependencies (managed automatically when possible).
Python Dependencies (Automatic Installation)
These are installed automatically via pip:
Core Dependencies
numpy- Numerical computingmatplotlib- Plotting and visualizationtkinter- GUI framework (usually included with Python)rioxarray- Geospatial raster dataxarray- Multi-dimensional arrays
InSAR-Specific Dependencies
asf_search- Alaska Satellite Facility data searchrequests- HTTP library for data downloadsbeautifulsoup4- HTML/XML parsing
Geospatial Dependencies
shapely- Geometric operationscartopy- Cartographic projectionsbasemap- Map plotting (Linux/macOS only)
Optional Dependencies
h5netcdf- NetCDF4 via h5pydask- Parallel computingscipy- Scientific computingpandas- Data analysis
System Dependencies (Automatic Management)
InSARLite automatically manages its primary dependency:
GMTSAR (Automatic Installation)
GMTSAR is the core processing engine for InSAR analysis. InSARLite includes an automatic installation system that:
✅ Detects existing installations on first startup
✅ Prompts for automatic installation if not found
✅ Handles system package dependencies (when sudo access available)
✅ Downloads and compiles GMTSAR from source
✅ Configures environment variables automatically
⚠️ Provides manual instructions for restricted environments
Note
Automatic Installation: On first startup, InSARLite will check for GMTSAR and offer to install it automatically. This requires approximately 15-30 minutes and 2GB of disk space.
Warning
Sudo Access: Some system packages require administrator privileges. If you don’t have sudo access, InSARLite will list the required packages for your system administrator to install.
Installation Methods
Method 1: Using pip (Recommended)
The easiest way to install InSARLite is using pip:
pip install insarlite
For Python 3 specifically:
pip3 install insarlite
Method 2: Using conda
If you prefer conda, you can install the dependencies first:
# Create a new environment
conda create -n insarlite python=3.9

# Activate the environment
conda activate insarlite

# Install dependencies via conda
conda install -c conda-forge numpy matplotlib rioxarray xarray cartopy shapely

# Install InSARLite via pip
pip install insarlite
Method 3: Development Installation
For development or to get the latest features:
# Clone the repository
git clone https://github.com/mbadarmunir/InSARLite.git
cd InSARLite

# Install in development mode
pip install -e .
Platform-Specific Instructions
Linux (Ubuntu/Debian) - Recommended Platform
# Update system packages
sudo apt update

# Install basic Python dependencies
sudo apt install python3-pip python3-tk

# Install InSARLite
pip3 install insarlite

# Launch InSARLite (GMTSAR will be installed automatically)
python3 -c "import insarlite; insarlite.main()"
Note
Fully Tested Platform: Ubuntu is our primary development and testing platform. All features are expected to work correctly.
Note
Automatic GMTSAR Setup: On first launch, InSARLite will automatically install GMTSAR and its dependencies. This includes packages like csh, autoconf, gfortran, libgmt-dev, etc.
Linux (CentOS/RHEL/Fedora) - Experimental Support
# Install basic dependencies
sudo dnf install python3-pip python3-tkinter  # Fedora
# OR
sudo yum install python3-pip tkinter          # CentOS/RHEL

# Install InSARLite
pip3 install insarlite

# Launch InSARLite (GMTSAR will be installed automatically)
python3 -c "import insarlite; insarlite.main()"
Warning
Experimental Support: The automatic GMTSAR installer is optimized for apt (Debian/Ubuntu). On RHEL-based systems, you may need to manually install some dependencies or work with your system administrator.
Note
Package Manager Differences: Some package names may differ on RHEL-based systems. If automatic installation fails, refer to the manual installation section.
macOS - Experimental Support
# Install Python via Homebrew (if not already installed)
brew install python

# Install basic geospatial dependencies
brew install gdal geos proj

# Install InSARLite
pip3 install insarlite

# Launch InSARLite (GMTSAR installation may require additional steps)
python3 -c "import insarlite; insarlite.main()"
Warning
Experimental Support: InSARLite has limited testing on macOS. Some features may not work as expected.
Warning
macOS GMTSAR Installation: Automatic GMTSAR installation on macOS may require additional configuration. You might need to install Xcode command line tools first: xcode-select --install
Windows Subsystem for Linux (WSL2) - For Windows Users Only
Warning
NOT OFFICIALLY SUPPORTED: WSL2 has not been tested with InSARLite. The following instructions are provided as-is for Windows users who wish to experiment, but we cannot guarantee functionality or provide support for WSL-specific issues.
Recommended approach: Use a native Ubuntu installation (dual-boot or virtual machine) for reliable operation.
Since GMTSAR cannot be installed on native Windows, Windows users may attempt to use WSL2:
Install WSL2 with Ubuntu 20.04 or 22.04
Follow the standard Ubuntu installation instructions above
Configure X11 display forwarding for GUI support
Be prepared for potential compatibility issues
For detailed WSL setup, consult Microsoft’s WSL documentation.
Virtual Environment Setup (Recommended)
Using a virtual environment helps avoid dependency conflicts:
Using venv (Python 3.3+)
# Create virtual environment
python3 -m venv insarlite_env

# Activate (Linux/macOS)
source insarlite_env/bin/activate

# Activate (Windows)
insarlite_env\\Scripts\\activate

# Install InSARLite
pip install insarlite
Using conda
# Create environment
conda create -n insarlite python=3.9

# Activate environment
conda activate insarlite

# Install InSARLite
pip install insarlite
Verification
After installation, verify that InSARLite is working correctly:
# Test the installation
python -c "import insarlite; print('InSARLite imported successfully')"

# Launch the GUI
InSARLiteApp
If the GUI opens without errors, the installation was successful!
GMTSAR Automatic Installation Workflow
InSARLite includes an intelligent automatic installation system for GMTSAR. This section demonstrates the installation process using a clean Ubuntu environment.
Note
Installation Screenshots: The following screenshots were captured on Ubuntu (in a clean environment without pre-installed dependencies). The same workflow applies to any Ubuntu 20.04+ or 22.04+ installation.
Step 1: First Launch - GMTSAR Not Found
When you launch InSARLite for the first time without GMTSAR installed:
insarlite
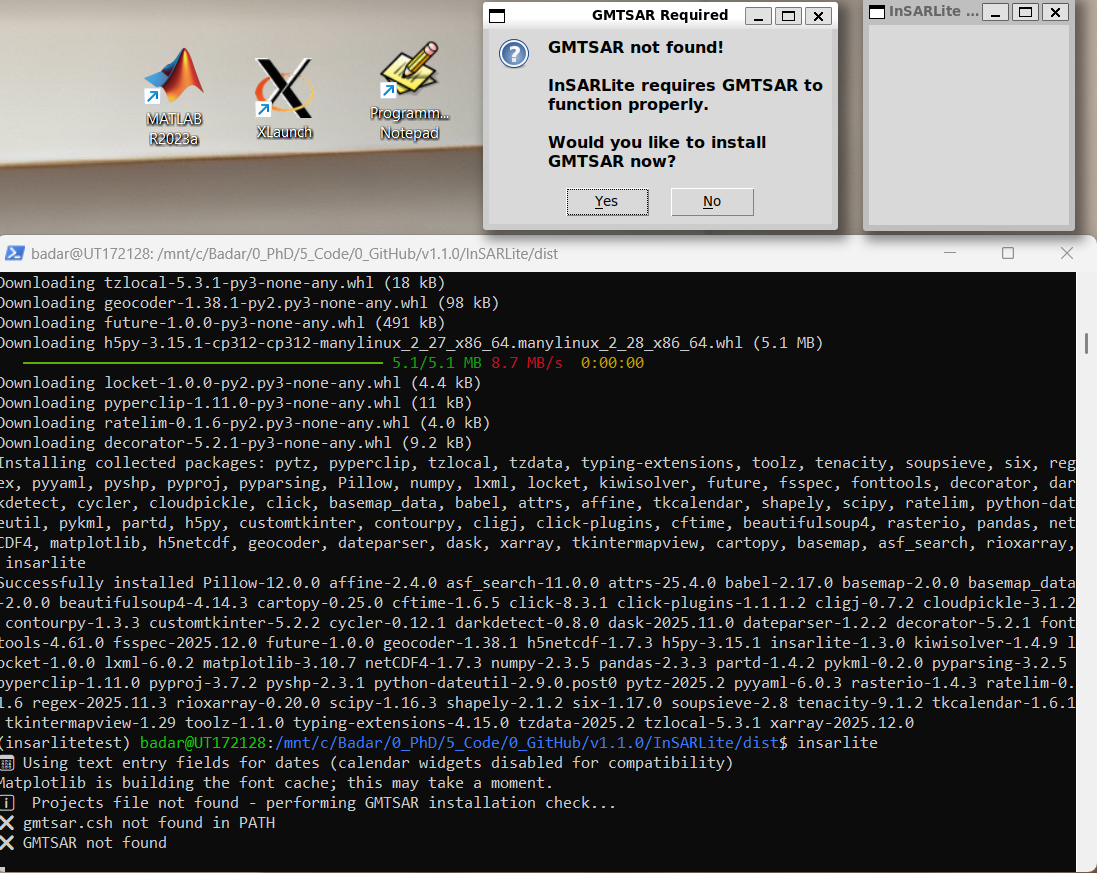
Figure 1: First launch of InSARLite showing GMTSAR not detected. The main interface appears with a prompt asking if you would like to install GMTSAR. The terminal window shows the automatic detection process.
InSARLite automatically checks for GMTSAR and prompts you for installation. Click Yes to proceed.
Step 2: Select Installation Mode
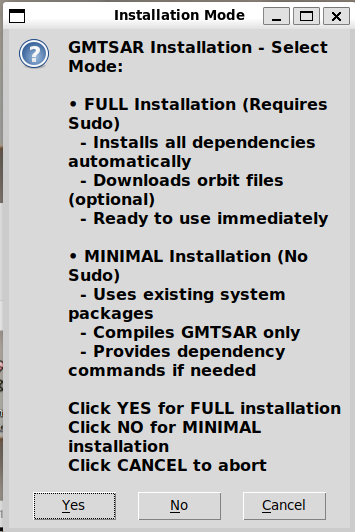
Figure 2: Installation mode selection dialog offering Full Installation (requires sudo access), Minimal Installation (no sudo required), or Cancel.
InSARLite offers two installation modes:
Full Installation (Recommended)
✅ Automatically installs all system dependencies
✅ Downloads and compiles GMTSAR from source
✅ Compiles SBAS parallel with OpenMP support
✅ Optionally downloads precise orbit files
⚠️ Requires sudo (administrator) access
⏱️ Takes approximately 15-30 minutes
Minimal Installation
✅ Attempts installation using existing system packages
✅ No sudo access required
✅ Provides detailed dependency list if packages are missing
ℹ️ Best for systems where you don’t have admin rights
ℹ️ May require system administrator assistance
Select Full Installation for automatic setup.
Step 3: Orbit Files (Optional)
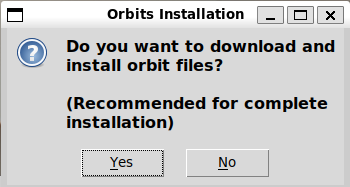
Figure 3: Optional prompt to download and install Sentinel-1 precise orbit files. This step can speed up future processing but requires several GB of storage.
Precise orbit files improve SAR image georeferencing accuracy. Options:
Yes: Download complete orbit archive now (~4-5 GB, takes 20-40 minutes)
✅ Enables offline processing
✅ Faster processing (no download waits)
⚠️ Requires significant storage
No: Download orbits as needed during processing (recommended)
✅ Saves storage space
✅ Only downloads required orbits
ℹ️ Small delay during first use of each orbit
For this example, we selected No.
Step 4: Sudo Authentication
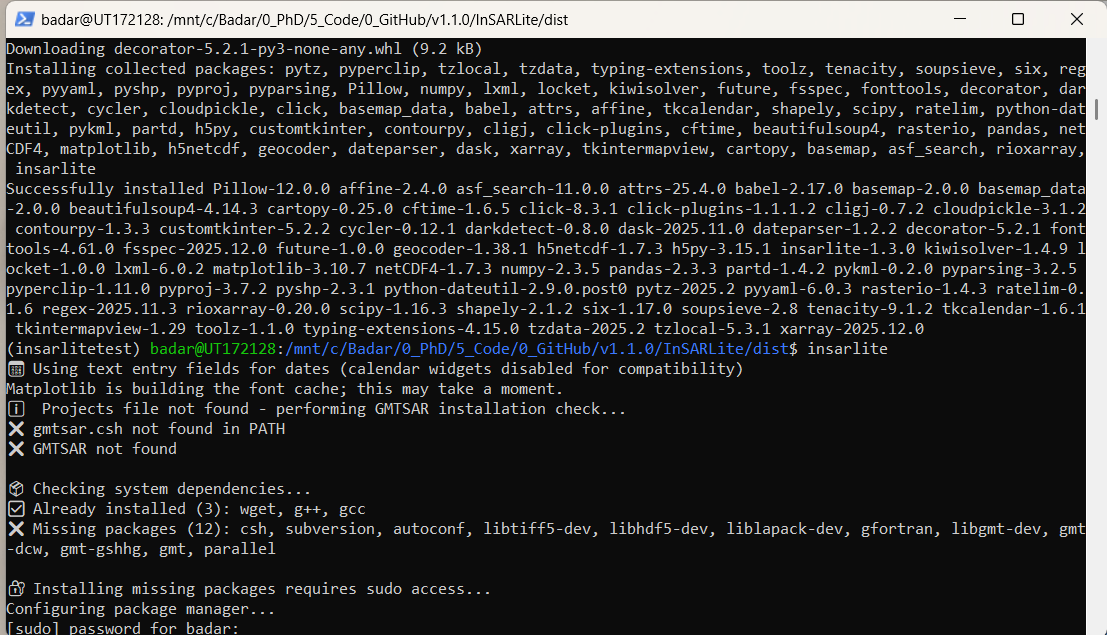
Figure 4: Terminal requesting sudo password for Full Installation. The password is hidden for security (no characters displayed while typing).
For Full Installation, enter your administrator password when prompted. The password won’t be displayed as you type (this is normal Linux security behavior).
Step 5: Confirm Installation
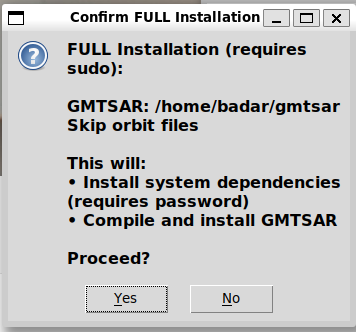
Figure 5: Final confirmation dialog summarizing selected options (Full Installation mode, without orbit files). Review and click Yes to proceed.
Review your selections:
Installation mode: Full
Orbit files: No (can be added later)
Sudo access: Confirmed
Click Yes to begin automatic installation.
Step 6: Installation Process
The installation process will:
Install system dependencies (2-5 minutes)
csh,autoconf,gfortran,g++libgmt-dev,libtiff-dev,libhdf5-dev,liblapack-devGMT (Generic Mapping Tools) and geographic datasets
Clone GMTSAR repository (1-2 minutes)
Downloads GMTSAR 6.x source code from GitHub
Configure and compile GMTSAR (10-20 minutes)
Runs autoconf to generate configuration
Compiles with parallel make (uses multiple CPU cores)
Builds all GMTSAR components
Compile SBAS Parallel (1-2 minutes)
Compiles with OpenMP support for multi-threading
Links against GMTSAR, GMT, LAPACK, and BLAS libraries
Installs to user-accessible location
Configure environment variables
Sets
GMTSARvariableUpdates
PATHin~/.bashrcEnables automatic detection on future launches
Note
Progress Monitoring: Watch the terminal window for detailed progress updates. The installation continues in the background while the dialog remains visible.
Step 7: Installation Complete
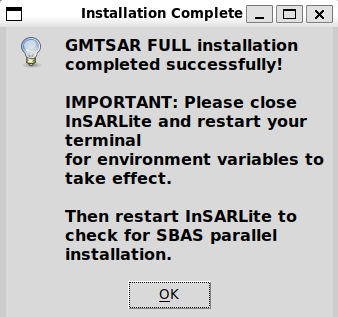
Figure 6: Installation completion dialog informing the user to restart InSARLite for environment variables to take effect.
Once installation completes successfully, you’ll see a completion message. Click OK.
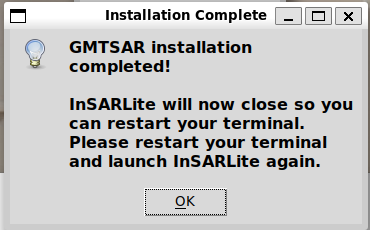
Figure 7: Confirmation that InSARLite will close to allow environment variable updates to take effect.
InSARLite will automatically close to ensure environment variables are properly loaded. Click OK.
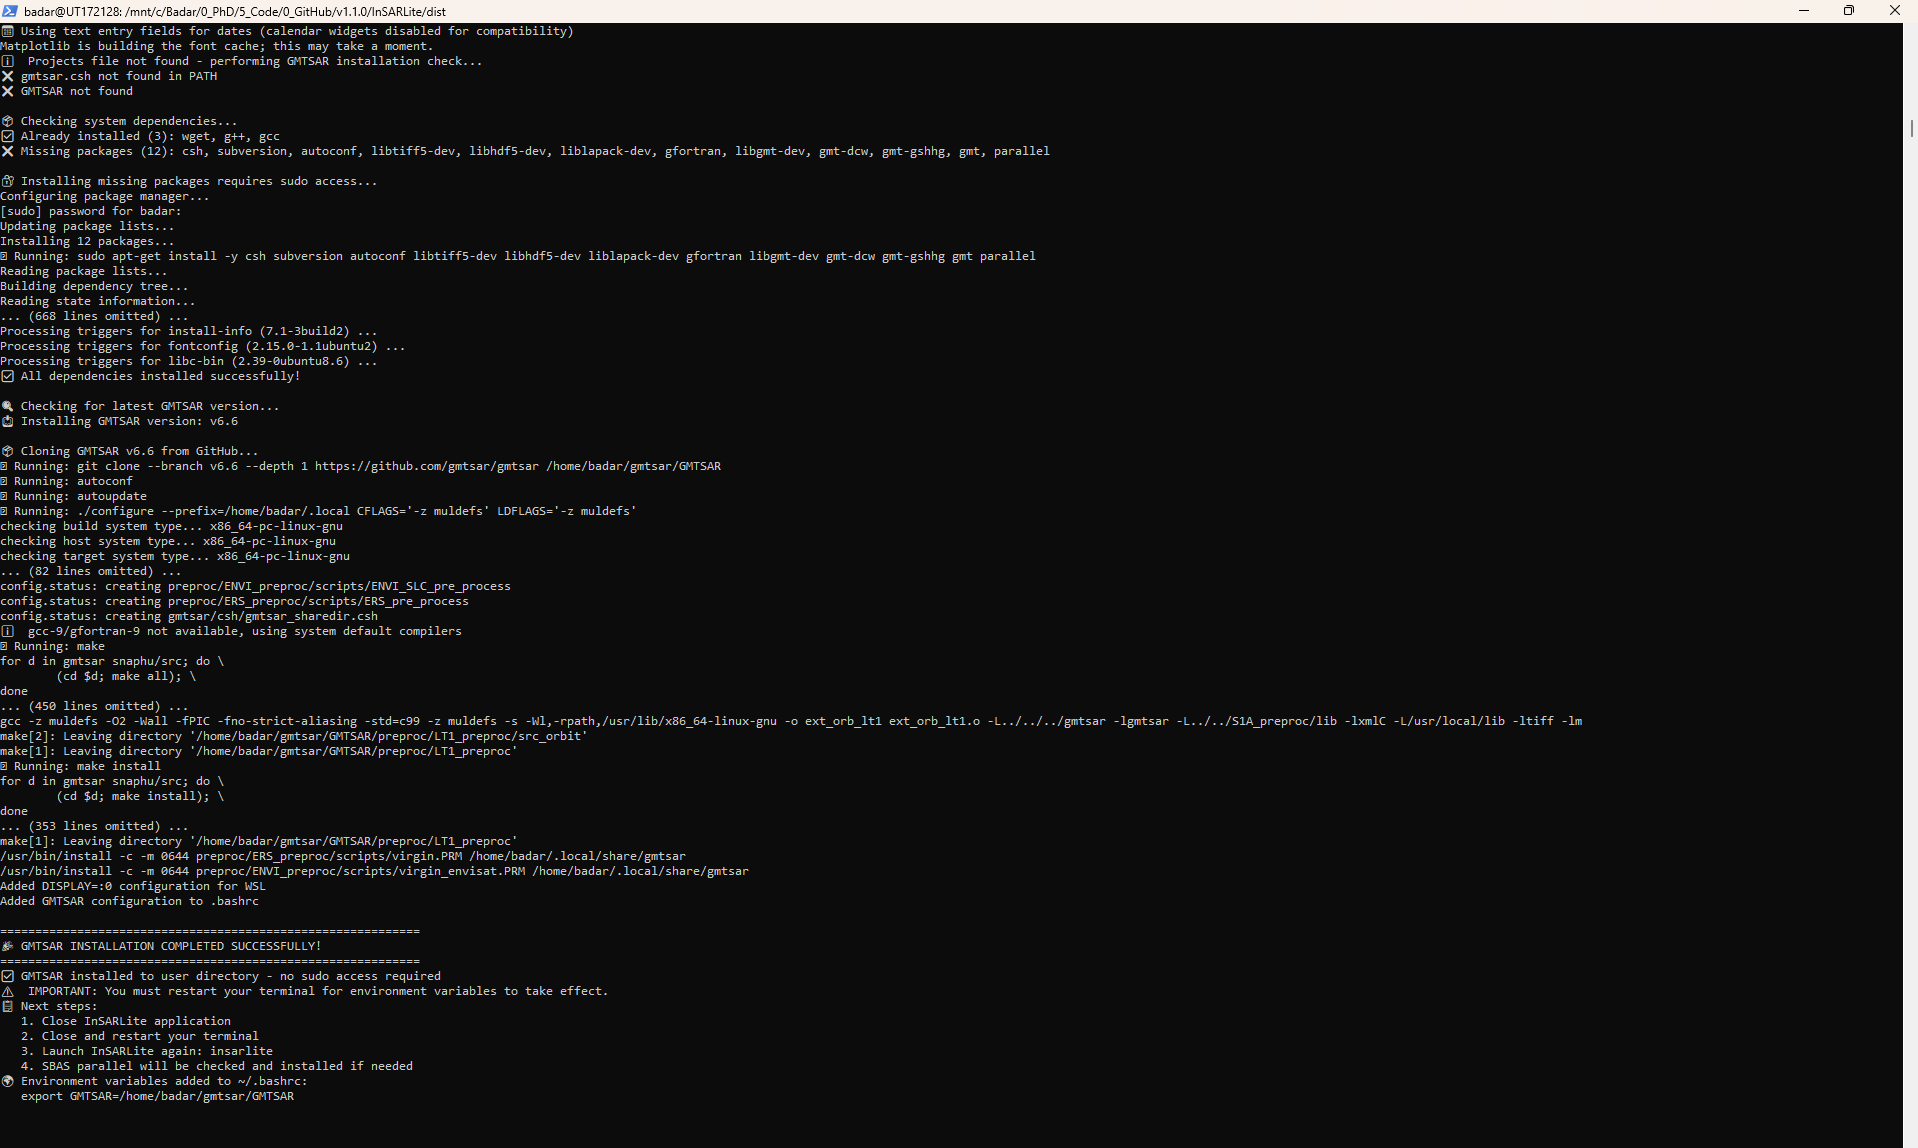
Figure 8: Terminal showing successful installation with confirmation messages and environment configuration status.
The terminal confirms successful installation with:
✅ All system dependencies installed
✅ GMTSAR compiled and installed
✅ SBAS parallel compiled
✅ Environment variables configured
Step 8: Relaunch InSARLite
Close your terminal and open a new one to load the updated environment:
# Close current terminal
exit

# Open new terminal and launch InSARLite
insarlite
InSARLite will now launch with GMTSAR fully configured and ready for SAR processing.
Verification
Verify successful installation:
# Check GMTSAR installation
which gmtsar.csh
# Should output: /path/to/gmtsar/bin/gmtsar.csh

# Check SBAS parallel
which sbas_parallel
# Should output: /path/to/bin/sbas_parallel

# Check environment variable
echo $GMTSAR
# Should output: /path/to/gmtsar

# Launch InSARLite
insarlite
# Should open main interface without GMTSAR warnings
Manual GMTSAR Installation (Advanced Users)
If automatic installation fails or you prefer manual control, follow these steps:
# Install system dependencies
sudo apt update && sudo apt install -y \
    csh autoconf gfortran g++ \
    libtiff5-dev libhdf5-dev liblapack-dev \
    libgmt-dev gmt gmt-dcw gmt-gshhg

# Clone and build GMTSAR
cd /usr/local
sudo git clone --branch 6.6 https://github.com/gmtsar/gmtsar GMTSAR
cd GMTSAR
sudo autoconf
sudo ./configure --with-orbits-dir=/usr/local/orbits
sudo make -j$(nproc)
sudo make install

# Set environment variables
echo 'export GMTSAR=/usr/local/GMTSAR' >> ~/.bashrc
echo 'export PATH=$GMTSAR/bin:$PATH' >> ~/.bashrc
source ~/.bashrc
Restricted Environment Setup
For systems without sudo access, ask your administrator to install:
# Required system packages
sudo apt install csh autoconf gfortran g++ libtiff5-dev \
                 libhdf5-dev liblapack-dev libgmt-dev gmt
Then GMTSAR can be installed to your home directory:
# Install to user directory
cd ~/
git clone --branch 6.6 https://github.com/gmtsar/gmtsar GMTSAR
cd GMTSAR
autoconf
./configure --prefix=$HOME/gmtsar --with-orbits-dir=$HOME/orbits
make -j$(nproc)
make install

# Add to environment
echo 'export GMTSAR=$HOME/GMTSAR' >> ~/.bashrc
echo 'export PATH=$GMTSAR/bin:$PATH' >> ~/.bashrc
Troubleshooting
Windows and WSL Issues
“Platform Not Supported” Error on Windows
Cause: InSARLite attempted to install GMTSAR on native Windows
Solution:
Install WSL2 with Ubuntu:
wsl --install -d Ubuntu-20.04Launch Ubuntu from Start Menu
Install InSARLite inside WSL, not on Windows
GUI Not Appearing in WSL
Cause: Display server not configured
Solutions:
Windows 11: Update to latest version (WSLg should work automatically)
Windows 10: Install VcXsrv and configure DISPLAY variable:
export DISPLAY=$(cat /etc/resolv.conf | grep nameserver | awk '{print $2}'):0
Test display: Run
xeyesorxcalcto verify X11 forwarding
WSL Performance Issues
Cause: Files stored on Windows filesystem
Solution:
Store data in WSL filesystem:
/home/username/data/Avoid Windows drives:
/mnt/c/(much slower)
“Cannot connect to X server” Error
Cause: X11 server not running or DISPLAY not set
Solutions:
Install X11 tools in WSL:
sudo apt install x11-utils x11-apps
Check automatic DISPLAY configuration:
# InSARLite automatically sets DISPLAY=:0 for WSL
echo $DISPLAY
source ~/.bashrc
Manual DISPLAY configuration (if automatic setup fails):
echo 'export DISPLAY=:0' >> ~/.bashrc
source ~/.bashrc
Install X11 server on Windows (VcXsrv or Xming)
InSARLite Issues
ImportError: No module named ‘tkinter’
Solution: Install tkinter
# Ubuntu/Debian
sudo apt install python3-tk

# CentOS/RHEL/Fedora
sudo dnf install python3-tkinter
ModuleNotFoundError: No module named ‘cartopy’
Solution: Install cartopy dependencies
# Linux
sudo apt install libproj-dev proj-data proj-bin libgeos-dev

# macOS
brew install proj geos

# Then reinstall
pip install cartopy
GMTSAR Installation Issues
Permission denied during installation
Cause: Insufficient permissions for system directories
Solution:
Use sudo for system installation, OR
Install to user directory (see Restricted Environment Setup above)
Compilation errors
Cause: Missing development tools or libraries
Solution: Install build essentials
sudo apt install build-essential cmake pkg-config
“Command not found” after installation
Cause: Environment variables not set
Solution: Update environment
source ~/.bashrc
# OR restart terminal
Missing orbit files
Cause: Orbit download failed during installation
Solution: Download manually
cd $GMTSAR
wget http://topex.ucsd.edu/gmtsar/tar/ORBITS.tar
tar -xf ORBITS.tar
General Issues
Memory errors during processing
Solution:
Increase system memory
Process smaller data subsets
Use data decimation options
Display issues on remote systems
Solution: Enable X11 forwarding
ssh -X username@hostname
# OR
ssh -Y username@hostname
Getting Help
If you encounter issues:
Check the error message carefully
Update your installation:
pip install --upgrade insarliteCheck dependencies: Ensure all required packages are installed
Search existing issues: GitHub Issues
Create a new issue: Include your OS, Python version, and full error message
Next Steps
After successful installation:
Read the Quick Start Guide
Follow the User Guide
Try the Tutorials
Updating InSARLite
To update to the latest version:
pip install --upgrade insarlite
To check your current version:
import insarlite
print(insarlite.__version__)